Discover Photoshop photo editing tutorial podcast

Photoshop photo editing tutorial podcast
Author: Jack
Subscribed: 3Played: 4Subscribe
Share
Description
Always share new tricks of Photoshop commercial photo editing tutorial podcast.
46 Episodes
Reverse
Image Masking in PhotoshopImage masking in Photoshop is a powerful technique that allows you to edit parts of an image and remove unwanted elements. This technique, also known as layer masking, is most often used to crop out the background of a photo. Its benefits go far beyond removing the pesky background and ensuring that your subject is the only thing you see. Whether you're working on a portrait, a product shot, or a complex collage, image masking is a great tool to have on your tool belt.Image masking is important for enhancing and improving product images. It also allows you to alter the background. For example, most companies prefer to use a white background in their catalogs. Using an image masking service helps you achieve that. With a few clicks of the mouse, you can make a stunning photo that you'll love to show off. If you're unsure of how to mask an image, you can contact a professional Photoshop service and get your image enhanced to look its best.Image masking services differ in their complexity. The process of removing an object can be extremely intricate, requiring the use of several image masking techniques. You can expect your image to be highly customized and tailored to meet your needs. And they will work with any budget. You won't need to worry about your images being too large or too small to have a customized service. You can count on their affordable rates and excellent customer service.Image masking services are a convenient way to fix your images. These services are very convenient, fast, and accurate. And with the ability to customize the images according to your specifications, you can achieve the perfect result for your photos. The tools of Photoshop make them possible. By using clipping path or a transparent area, you can alter specific parts of the image. You can then export the edited picture as a new one.Photoshop image masking service is an important function in photo editing. It allows you to remove the background of a soft-edged image. If you have an old photograph, you can use this technique to change its background. You can reuse the extracted images with a different background. With the help of the technique, you can remove blemishes in a photograph. And you can even change the entire background of an image. https://www.academia.edu/65145069/Can_You_Really_Learn_How_To_Use_Complex_Image_Masking_in_Photoshop https://www.slideserve.com/staciekjones/learn-how-to-use-complex-image-masking-in-photoshop-made-simple https://docdro.id/5voUi2H https://www.edocr.com/v/dkgjnx2p/staciekjones/you-really-learn-how-to-use-complex-image-masking- https://visual.ly/community/Others/computers/5-actionable-tips-learn-how-use-complex-image-masking-photoshop https://www.4shared.com/s/ffEJr-LcRiq
Understanding Layer Masks in PhotoshopLayer masks are used to mask and hide parts of an image or part of a layer. The purpose is to create artistic effects that are hard to achieve using other methods. Masking in photoshop is also known as Layer Masks, because it allows you to hide and reveal layers on your Photoshop document with simple click-and-drag actions.Layer masks in Photoshop are also used as clipping masks, which means they can be used to clip layers together. Clipping masks is essentially a layer mask that allows only with another layer or group of levels above it (clipper level) can show through the clipped area. How To Use Clipping Masks In Photoshop – A Complete GuideClipping masks are basically layers that cover parts of the image. They have a layer mask, which is basically a selection area on top of the image. When you click on it with your cursor, this selects all pixels within the mask (hence clipping). In photoshop there are two ways to create a clipping mask: Create a mask from scratch by using the Paint Bucket Tool (easy), or via selection tools: Rectangle Select, Marquee Selection, Lasso/Polygonal Lasso tools and even more. Image masking is an old-new concept that has recently seen a rise in usage due to technological advancement. It’s a concept that’s used to conceal a part of the image and it works particularly well when done well. You can have any image masking done by an automated tool, but that’s only going to be half as good at the job a human can do. You need to employ a right tool that can help you get the best of services at the best costs and we are one such company. We are a team of well experienced and talented individuals our recent work has been featured all over the world. we are in different fields of photography and have worked on prestigious projects such as; Corporate and Marketing Photography. What are some ways to use masking in photoshop?There are many ways to use masking in photoshop. Some of the most common uses for masking are:• Select a layer and paint over it with black. This will create a new layer that will not be visible while you work on the original layer. https://www.academia.edu/64746613/Learn_How_To_Layer_Masking_in_Photoshop_Made_Simple https://www.slideserve.com/staciekjones/5-actionable-tips-on-learn-how-to-layer-masking-in-photoshop https://docdro.id/KFq6dcQ https://www.edocr.com/v/n8xwqrdn/staciekjones/you-really-learn-how-to-layer-masking-in-photoshop https://visual.ly/community/Others/computers/can-you-really-learn-how-layer-masking-photoshop https://www.4shared.com/s/fV7Hz_KTBea
Photoshop Masking and Compositing: FundamentalsPhotoshop masking and compositing fundamentals is a book that will help you to learn masking in photoshop. You can use masking techniques to create 3D text effects, create realistic photo masks, remove unwanted objects from photos or videos and much more.Adobe Photoshop: Masking & Compositing FundamentalsMasking and compositing are often used interchangeably, but masking is the process of using a mask to conceal or reveal parts of an image. Composing, on the other hand, involves combining multiple images into one image in order to create a single visual effect.What is the difference between compositing and blending images in photoshop?Blending is the process of combining two or more images into one image using software such as Adobe Photoshop. Compositing is the process of creating a visual effect by layering multiple elements in an image and then combining them.In this article, we will be focusing on compositing which is a better option to blend images in photoshop.Masking is a masking tool that you can use to create complex masking effects. It allows you to cover areas of an image and blend the colors from one area into another. You can mask out parts of your photo with different types of masks, including brushes, stampers, and selections.
Ghost mannequin photography ghost mannequins take your products to a whole new level of realism with this e-book that teaches you everything about creating a ghost.The blur can be achieved using on automatic or manually, as well its size and intensity is also adjusted. Can be used in your own photos.Basic one-click wonder & ready to work with every photo (1920x1080 p). It is possible to customize different points of lighting, turn off the highlights and shadows individually. Ghost mannequin photography is a fun, quick and easy way to create mannequin shots for social media. Ghost mannequin photography involves taking photos of mannequins dressed in different costumes that you can then use as your profile picture on Instagram or Facebook. The costumes are cheap and simple to buy from any online store like Amazon or eBay, so it’s easy to get started with ghost mannequin photography ! You will be able to create exactly the same shots as those famous professional photographers who spend hours in front of full-length mannequins. https://www.academia.edu/63606327/Learn_How_To_Take_Ghost_Mannequin_Photography_and_Editing_in_Photoshop_Made_Simple https://www.slideserve.com/staciekjones/can-you-really-learn-how-to-take-ghost-mannequin-photography-and-editing-in-phot https://docdro.id/r9bOGj5 https://www.edocr.com/v/nrmoomag/staciekjones/you-really-learn-how-to-take-ghost-mannequin-photo https://www.4shared.com/s/fPMs2W-e4iq https://visual.ly/community/Others/computers/5-actionable-tips-learn-how-take-ghost-mannequin-photography-and-editing
High-quality Photoshop masking services. It’s pixel perfect to isolate parts of an image. Offering hair, layer & transparent object masking. Photoshop Image Masking Service like product masking, object masking, hair masking, fur masking at affordable price. Get pitch-perfect edge selection no matter how fuzzy or furry your edge is because of our high-quality image masking service.What is Photoshop image masking Service?Photoshop masking is a technique in Photoshop, which is used to cut out an object from an image background. It can be done on layers or selections.The way it works is by cutting the selected object on a different layer and adding its own background so that it will not look like it's floating. This technique can be achieved easily with our Photoshop Image Masking Service.We offer multiple masking methods for your convenience: hair masking, layer masking, and transparent object masking. https://www.academia.edu/63393964/Learn_What_is_Photoshop_Masking_Services_Made_Simple https://www.slideserve.com/staciekjones/can-you-really-learn-what-is-photoshop-masking-services https://docdro.id/Q23wVHc https://www.edocr.com/v/oevnpzzx/staciekjones/you-really-learn-what-is-photoshop-masking-service https://visual.ly/community/Others/how/5-actionable-tips-learn-what-photoshop-masking-services https://www.4shared.com/s/fYJ5sB4_sea
how do you take pictures without mannequin clothesGhost mannequin is a mannequin that has been made to look like an actual person. This helps the photographer in getting some creative angles and expressions from the mannequin, which can help him in creating amazing pictures for his clients.How to take Pictures of Clothes without the Mannequin in 2021Manequin mannequin is a mannequin that has been modified to have the same proportions as an actual human being. It's used in photography, fashion design and marketing. In 2021, there were more than 3 million mannequins in stores around the world.Step by Step Procedure of the Ghost Mannequin EffectIf you want to take pictures without mannequin clothes, then this is the right guide for you. In this article, we are going to tell how do you take mannequin pictures and how can they be used in your marketing strategies. We will also give a step by step procedure of ghost mannequin effect that makes it look like a real person wearing the clothing but actually it's nothttps://www.academia.edu/63159308/Learn_How_To_ghost_mannequin_editing_services_in_Photoshop_Made_Simple https://www.slideserve.com/staciekjones/can-you-really-find-learn-how-to-ghost-mannequin-editing-services-in-photoshop https://docdro.id/ipqpRjv https://www.edocr.com/v/wkzoo6ky/staciekjones/you-really-find-learn-how-to-ghost-mannequin-editi https://visual.ly/community/Others/how/5-actionable-tips-learn-how-ghost-mannequin-editing-services-photoshop https://www.4shared.com/s/fTzG5MIY1ea
Photoshop Layer Mask Basics For Beginners If you’re ever wondering when to use a layer mask or not, then skip this lesson. You will learn in this article when layers with masks are used and how they work with the Photoshop Filter Gallery: Transform dialog box for Before/After Camera Raw adjustments (see “Workflow Basics: Layer Masks and Performances”).Getting Started with Layer Masks in Photoshop – a Beginners TutorialMasking is one of the most useful photoshop techniques. A layer mask in photoshop allows you to create complex effects by applying different elements on top of an image, which means that it creates a composite effect without having to use any additional layers.What is a Photoshop Layer Mask?Photoshop Layer Mask is a feature that allows you to edit the transparency of an image layer. It lets you mask out parts of your image or apply different effects on selected areas. A photoshop layer mask can be used for anything from creating complex patterns, to removing people's faces in photographs, and even concealing sensitive information like credit card numbers or passwords. The Layer Mask and Photoshop: https://www.academia.edu/63041197/Easy_Ways_To_Learn_How_To_Photoshop_Masking_Basics_For_Beginners_Faster https://www.slideserve.com/staciekjones/5-actionable-tips-on-learn-how-to-photoshop-masking-basics-for-beginners https://docdro.id/sxhrns6 https://www.edocr.com/v/4g2kmj9b/staciekjones/learn-how-to-photoshop-masking-basics-for-beginner https://www.4shared.com/s/fZQGBd5cDiq https://visual.ly/community/Others/computers/can-you-really-find-learn-how-photoshop-masking-basics-beginners
The Most Effective Automatic Background Remover for Your PhotosHave you ever captured a photo that is too cluttered? Too busy? Too noisy? Most cameras don’t come with features that allow you to remove the background of your images. Luckily, there are plenty of free apps and programs designed to help you edit your photos after the fact. Here's how to find one.What is a background remover?A background remover is a type of photo editing app that automatically erases the background of your photos. Once you’ve loaded your photo into the app, it can automatically crop the background of the photo, delete any parts of the image you don’t want, and remove any undesirable objects.The app will also save the original images, so you can always re-edit them if you don’t like your final product. You can also save your final product to one of your own custom folders for easy access to your edited photo.One of the most popular background remover apps is Photoshop Express. It offers a wide variety of editing tools for just $9.99 per month or $9.99 per year. If you’re looking for a free app that offers these same features, try Snapseed. It’s free and has many of the same features as Photoshop Express.No matter what type of editing you need, there’s an app to suit your needs! https://www.slideserve.com/staciekjones/can-you-really-find-learn-the-most-effective-automatic-background-remover-for-yo https://docdro.id/KZbzYBY https://www.edocr.com/v/d2l1dw2b/staciekjones/easy-ways-to-learn-the-most-effective-automatic-ba https://www.4shared.com/s/fhMFlg5lEiq https://visual.ly/community/Others/computers/secrets-learn-most-effective-automatic-background-remover-your-photos https://www.academia.edu/62448854/5_Actionable_Tips_on_Learn_The_Most_Effective_Automatic_Background_Remover_for_Your_Photos
What Is Clipping Path Service And How Can It Help You?What is clipping path service and how does it help the photographer? Clipping path services are provided by professional image editing services providing to photography firms for automatically removing objects or people in still images, generally includes image clipping path services to photo editing software. A clipping path is used by many professional photographers and graphics artists as it helps them to manipulate and correct photo subjects by simply moving out the unwanted parts of an image. Clipping path service is important for product photographers, illustration artists, online seller to clearly represent their merchandise to their potential buyers, and graphic designers as all publishing software usually arrange everything outside of the clipping path.Why use a clipping path? Clipping path is an important thing for photo retouching and photo editing. Why is it important thing? Well, it's an important thing because clipping path allows a photographer to make changes to a photo subject without disturbing the original image. If you make changes to a photo subject without disturbing the original image, however those changes are clearly visible in the photo. By making use of clipping path you are able to remove unwanted background.So what is clipping path service and what is it used for? Basically this service can be defined as a technique that allows adjusting or modifying a particular photograph with the help of a bitmap. A lot of services providers are coming up with better ways of providing digital photo editing services, one such service provider who is providing amazing digital photo editing service at an affordable price is Photoshop Service. In this article I am going to tell you more about Photoshop service and how powerful it is.Photoshop is widely used by many people and is widely known as one of the most popular software for editing pictures. Even though there are various versions of Photoshop available in the market today, Adobe Photoshop is widely used by advertising agencies, web designers and freelance photographers. Many people are using Adobe Photoshop to edit their images and photos to improve the image quality and appearance. So if you are someone who likes to change images with different effects, then you must go for this service. https://www.4shared.com/s/f81_1mlcaea https://www.slideserve.com/staciekjones/what-is-clipping-path-how-does-it-work https://www.academia.edu/61738643/Easy_Ways_To_Make_how_clipping_path_service_work_why_we_use https://docdro.id/1MHbidi https://www.edocr.com/v/7gj8mpqv/staciekjones/what-is-clipping-path-and-how-can-it-help-you
Learn How to Remove Background from a Photo with These TipsRemoving the background from a picture can be a difficult task. There are a number of different tools and techniques you can use to remove a background from a picture. In this blog I will discuss a few of these options and the differences between them. Have you ever wanted to remove the background from a photo? Have you done it but are not totally happy with the results? Well, there are ways that you can remove the background from an image to help create an image that has only the subject remaining.Methods to Remove the Background1. Slice and Dice. If you have a digital camera that has advanced processing power then there are several programs and image editing software that can remove a background. Some of these programs can remove a lot of unwanted elements from your photo without sacrificing the rest of the photo. One of the programs that comes to mind first is Photoshop. Photoshop is the most commonly used image editing program and is used by professionals. With the included tools in Photoshop you can quickly and easily remove the background from a photo without giving up the rest of the image. Here is a screenshot showing a selection of the tools within Photoshop. A selection of the tools within Photoshop.How to Choose Which Tool to UseThere are a number of different methods to remove a background. The most common ones are cropping, merging, and zooming. Choosing the right technique for the type of picture that you want to remove the background from can be difficult. I will go over each one and explain why they can be used and how they work. I will also review a few different options to choose from. Curves – Curves is probably the most versatile technique. It is used to resize an image and then remove the background. It is also used to create an interesting shadow. The basic idea of using curves is to cut off the top of an image. When you do this, the picture will then be cut down to size and will look a bit like a painting. https://www.academia.edu/61684945/How_to_Remove_Background_from_Photo_in_Photoshop_Made_Simple https://www.slideserve.com/staciekjones/can-you-really-find-how-to-remove-background-from-photo-in-photoshop-tutorial https://docdro.id/6jRIaZx https://www.edocr.com/v/a3gv9y8a/staciekjones/easy-ways-to-make-how-to-remove-background-from-ph https://www.worldranklist.com/preview/pdf/402192/The-Secrets-How-to-Remove-Background-from-Photo-in-Photoshop-Quickly https://www.4shared.com/s/fDAeBFUW0ea
Taking pictures can be a lot of fun and one of the most exciting things about taking pictures is the background. You can take pictures of your family or your sweetheart or your kids and make sure that the background is perfect. The background makes the picture. But what happens when you want to take a picture and there isn't a good background? This blog will help you take the background out of a photo.Take a pictureIt can be difficult to take a picture without any background, but you can certainly add one. The easiest way is to just add some background to the picture. If you want to add a frame to the picture, then you can buy a frame and use the back of your credit card to place it in the frame. If you want to draw a mask or do something artistic with the background, then you can do that. It's always easy to add a frame to a picture if there isn't one already. Lighting The best thing to do is go outside in the evening. It can be cold or it can be hot. Just be sure to take pictures in a cool place and take your kids and pets if they are willing. They might like to join in the picture.Save the photoSave the photo to a file where you can access it later. You can do this by saving the photo to a file on your computer (although you can do it on your phone, too). Use a picture-editing program Use a photo-editing program like Adobe Photoshop or Apple's photo-editing program. You can also use free photo-editing programs like Gimp, GIMP, Paint.net, PhotoImpact, and PicMonkey. Find a new background Find a new background or find an alternative background for your photo. Remember to make sure that the background you choose still ties into the photo and doesn't distract from it. Photoshop with art filters A trick for taking the background out of a photo is to use a photo-editing tool like Photoshop to add a layer mask. https://www.academia.edu/61557261/How_to_Take_the_Background_Out_of_a_Photo_Made_Simple https://www.slideserve.com/staciekjones/how-to-take-the-background-out-of-a-photo-the-simplest-easiest-method https://docdro.id/UwQZn82 https://www.edocr.com/v/agqm254n/staciekjones/5-tips-about-how-to-take-the-background-out-of-a-p https://www.4shared.com/s/freEZyxDdea
What is retouching?The most fundamental idea of how to edit a photograph is you simply highlight and select some areas. In photography, the focal point or the area you want to focus is called the top-center in your photo (photographer jargon). On our photos, we highlight this area with a bright color, but also by taking a photo. The area that we are going to enhance in our photo is the sky. The sky is the part of the photo, which usually does not appear very colorful or bright. This is the perfect spot to focus on for Photoshop users, because it is not very visible and not very obvious to everyone in the photo. It may be considered to be an ugly part of the photo. Why highlight areas in photos? When you highlight an area of your photo, the rest of the photo is already chosen and selected for you.How to retouch photos?Photographers need to edit photos very often. When clients like your pictures and want to improve them with any kind of customization, professional photo retouching is highly needed. Retouching is necessary for any picture and, depending on your specific photography needs, you may need it in order to show your style, or to improve the quality of your photographs. If you have work to do and want to get this done as soon as possible, let us help you. What’s included in the editing process?Top 5 photo editing tools for photographersPhotoshop Crop Tool -a key editing tool in the Photoshop photo editing application. Color-Tones -Digital image manipulation software which you can use to colorize the highlights and shadows to make the image look more natural. Exuberant. Formatted for the Web and Photos -a photo retouching application that allows you to make highly detailed adjustments to the levels and colors of your images. Luminar -Digital photo editing application that allows you to colorize, sharpen, adjust colors, and correct white balance. Moji -a simple photo editing application which you can use to create mini animated icons or characters using a pen and paper. Which retouching applications are best for digital photographers?The 10 Tips for retouching your photosYou can do it yourself, but in your to your own demise. Also, it's tedious. By now you know how to edit images in Lightroom. You can likely do the same with Photoshop, too. That said, if you want to take your editing skills to the next level, here are a few tips to make the job easier. All photography retouching takes a ton of time and patience. But it's an investment worth making. And there's no time like the present to learn. This article will provide you with the best tips and tricks to edit photos in Photoshop and Lightroom, no matter what level of photographer you are. The 10 Best Photoshop and Lightroom Resets 1. Clear out distractions How many photos do you have in your catalog? Chances are, there are a ton more than you have time to view. https://www.academia.edu/61499565/How_to_Retouch_Photos_for_Photographers_Made_Simple https://www.slideserve.com/staciekjones/can-you-really-find-how-to-retouch-photos-for-photographers-tutorial https://docdro.id/Dz1Z7I3 https://www.edocr.com/v/vdememjx/staciekjones/easy-ways-to-make-how-to-retouch-photos-for-photog https://www.4shared.com/s/feeFRcU9Tiq
If you take a close look at any of the mannequins that were available for sale at your local mall, you might notice that they are creepy. They are like a walking dead person — they walk just like you would imagine a corpse would. This is where the ghost mannequin concept comes into play.
Clipping path is also known as ink clipping path or raster clipping path. The process of making a clipping path is based on the mathematical algorithm. This algorithm takes an image and produces the desired result by optimizing the differences between every image component with respect to each other. This way a great image clipping path is achieved with minimum loss of quality. Let us have a look on how to make a clipping path with Adobe Photoshop.Adobe Photoshop has some useful tools like Masking tools and Brush Strokes that help to create a clipping path with ease. You can make a clipping path by using any one of those tools. To do so you will need to open a new Photoshop document. Thereafter you need to select the Image menu and click on Clipping path from the Options. The Adobe Photoshop provides several useful image editing services like Masking, Cropping, Radial Blending, Dithering, Adjustment Brush, Auto blur and Align tool for smooth image transition.In order to complete a clipping path service, select the Path from the Tools menu then from the Effects menu, click on Clipping path from the Clipping path service option. Then click on New from the Edit menu and fill the form with the data required. Type a name for the new path and choose a location for the path outsource. The location for the path outsource can be the origin, the destination or both.The Clipping path services provide various options for creating a clipping path. The basic option 'Clip path with default fill patterns' is very useful when you want to save the image without any formatting. The 'Clipping Mask' option is another option that provides an easy way to create a clipping path. The 'clipping mask' option in the properties dialog box of your editing area will display the clipping mask. Choose the 'New' button from the clipping path services menu to create a clipping mask from the existing image. Use the properties tool to set the width and height of the clipping mask. https://www.academia.edu/59070356/Take_Advantage_Of_A_Clipping_Path https://docdro.id/5h7p46a https://www.edocr.com/v/jpaabbrv/staciekjones/the-next-things-you-should-do-for-a-clipping-path- https://visual.ly/community/Others/how/these-ways-change-your-clipping-path https://www.4shared.com/s/fFRQphDeGiq https://www.worldranklist.com/preview/pdf/396906/The-Best-Things-About-A-Clipping-Path
How to choose the right clipping path service? The hardest part of clipping path services outsourcing is beginning. And, learn the right clipping path service company. It takes hard, time consuming tasks off of your plate, but often, you have to spend quite a bit of time in finding the right one and implementing new systems. On the upside, if you find the right company you'll save yourself tons of time and headaches. This article will give you some tips on how to choose the right company for your needs.The first step in how to choose the best Clipping Path service is to know exactly what you're looking for. If you're doing simple retouching or photo restoration, the basic process involves: setting up a basic white background. Then, start cropping out your image to create individual slices of your image, which are then composited into a "white background". The final step is: using color correction to create the exact shade of your background and create your clipping path.There are a number of different types of Clipping path services available in India. To begin with, there are many providers who offer services like live chat with a professional and tech support. Some of the other popular options include: batch processing, pre-compositing, clipping path creation, and image customization. In addition, there are providers offering services like live feedback, multiple format conversion, and advanced analytics. https://www.academia.edu/58995308/Clipping_Path_Service_Provider_On_A_Budget https://www.slideserve.com/staciekjones/make-your-clipping-path-service-provider-look-amazing https://docdro.id/9VoSHY5 https://www.edocr.com/v/4rlrpxnq/staciekjones/the-art-of-clipping-path-service-provider https://www.4shared.com/s/fgU_LVTlQiq https://visual.ly/community/Others/computers/advantage-clipping-path-service-provider
Wedding Photo Editing Service: Creating the perfect picture from a bunch of photos is the goal of a Wedding Photo Retouching service. No longer do you have to pick out all of the pictures to use for your big day. You can simply email them to a digital photo retouching service, and they will create the perfect image for you. Wedding photo editing services offer many options to make your wedding pictures perfect, such as renaming background images, adding borders and extra images, and much more. They can also fix red eye, remove defects and crooked lines, or adjust white balance problems in your picture.Wedding Photo Editing Service: Using a Wedding Photo Editing Service can make your wedding pictures perfect, without all the stress! When you plan your wedding, think about who will take the pictures and where they will be taken. Professional Wedding Photo Editing services have the equipment and the expertise to capture every moment of your special day, no matter where it happens. They can help with props, dress, hair and make up, and all the poses you might want to include. They will make each picture a masterpiece that will remind you and your guests of the special day for years to come. Your wedding is the most important day of your life, so make sure it's captured in a picture.Choose a Digital Photo Editing Service: You have several choices when it comes to choosing an online photo retouching service. Most offer editing services that are available on your computer, including retouching, photo restoration, photo editing, photo collage, and more. You can easily pick the one that will work best for your wedding. https://www.academia.edu/58978281/Best_Wedding_Photo_Editing_Service https://www.slideserve.com/staciekjones/best-wedding-photo-editing-service-tips-you-will-read https://docdro.id/AL4anxz
If you want to create a beautiful silhouette that transfers well to other applications to adjust the text, create a clipping path in Adobe Photoshop.How to Create a Clipping Path in Photoshop1. Select your image from its original orientation Here we will take a screenshot of an image. To select your image, you need to press the “Select” button, and then press “M” from the drop-down menu. On the left of the screen, you will see four tabs: “Snap to”, “Snap to”, “X” and “Delete”. Select “Snap to” as shown below. The following screenshot shows the screenshot. This will help you locate your image. 2. Duplicate the selected layer After you have selected your image and “Snap to” activated, you have to duplicate the selected layer to give it a background. As shown below, select “Duplicate” from the top menu bar of your Illustrator application. 3. Expose the Alignments What we need to do now is to adjust the Photoshop dimensions according to the dimensions of your final image.What is a Clipping Path?What is a clipping path? A clipping path or guide is used to adjust the positioning of an object within a photograph by either cropping the background or shifting an object closer to the center. That can easily be seen in a photograph such as the one below. Why do we use a clipping path in Photoshop? It’s an interesting question, why do we need to create a clipping path? It’s easier than you may think, as shown below: Before you begin creating a clipping path, it’s important to determine what type of clipping path you would like to create. Choosing the appropriate type of clipping path will give you more control over how it appears in the finished photograph. 1.Purpose of Clipping PathsClipping path makes use of subtle edge transparency to separate the background from a shape so that the object in the image looks sharp. Now that you know how to create a clipping path in Photoshop, learn how to create a path for your text. The steps below are best for editing images and web design. How to Create a Path in Photoshop: The Basic Steps Step 1 Open the picture file that you want to edit with the option of working with a vector shape. You can also work with a bitmap file if you want to. Step 2 To create the clipping path, right click on the image, select paths and then create a new shape with the path tool (File > New Shape). Step 3 Now, we want to create the perimeter of the shape which will be placed over the background image, and fill it with black. https://www.academia.edu/52238758/Apply_These_5_Secret_Techniques_To_Improve_How_To_Create_A_Clipping_Path_In_Photoshop https://www.slideserve.com/staciekjones/believing-these-5-myths-about-how-to-create-a-clipping-path-in-photoshop-keeps-y https://docdro.id/ILHR1Zr https://www.edocr.com/v/0zp5wkgj/staciekjones/how-5-things-will-change-the-way-you-approach-how- https://visual.ly/community/Others/computers/how-create-clipping-path-photoshop-awards-5-reasons-why-they-dont-work https://www.4shared.com/s/fEVspYIn8iq http://slideonline.com/presentation/509401-how-to-create-a-clipping-path-in-photoshop-doesn-t-have-to-be-hard-read-these-5-tips-pdf
Skin retouchingIn this step you will edit different parts of the face by changing light shadows and light accents to match the highlight. Look for the "diamond shape" in the light that normally touches the right cheek and turn up the saturation in the highlight area to make it pop. Eyebrow & Eyeliner There is a lot you can do with the eyes and the brows, changing their shape, adding gradients, painting or drawing them, even dusting with a powder to give them a fuller look. Hair Retouching Hair has many different angles that you can match with their line, you can even make it round if it’s an animal’s, you can exaggerate their natural volume by drawing a hairline above their brows, making them bigger or smaller, even adding a pompadour on an animal.Eyes retouchingPeople are amazed to see the transformation that is going on in their portrait. They like the balance between the vividness and the detail. You don’t want it to be too intense because it will be difficult for everyone to enjoy the image. When you use the techniques in this tutorial, you will see the difference in the eyes of your clients and friends. That is the result of the retouching work you are about to perform. We start with retouching the eyes because it is usually the most difficult part of the portrait retouching. In the end, you will see a dramatic transformation that will surprise you. If you would like to bring out your clients’ hidden beauty, you must pay attention to the eyes. It is essential to make sure that the background doesn’t look unnatural. https://www.academia.edu/52052836/Apply_These_5_Secret_Techniques_To_Improve_How_To_Get_Flawless_Skin_And_Bright_Eyes https://www.4shared.com/s/fBTfOMhhjiq https://visual.ly/community/Others/how/how-5-things-will-change-way-you-approach-how-get-flawless-skin-and-bright-eyes http://slideonline.com/presentation/509322-how-to-get-flawless-skin-and-bright-eyes-awards-5-reasons-why-they-don-t-work-what-you-can-do-about-it-pdf
What is a hair mask?What is a Photoshop layer mask? — via A Plane Ride Away. Photoshop layer masks control the transparency of the layer they are “worn” by. In other words, the areas of a layer that are hidden by a layer mask actually become transparent, allowing image information from lower layers to show through.A mask is a part of the bs detector of a colour correction tool. By masking your hair, you can adjust the amount of colour the hair has in relation to the rest of the face. How to use hair masking in photoshop Trick how to mask your hair in photoshop: When you are masking your hair in photoshop, first, you have to select all the hairs in your picture that you want to use. You can use hair masker. Use masking as you would normally do, first put on a stencil of your selected hair type. Make sure it has high contrast so it shows more in your picture. Now you are going to get the mask. You have a button called “muse”. It is a tool that will show you the effect of your mask in your pictures. Make sure you put it on your hair masker.Masking Techniques for PhotoshootsThere are a lot of hair masking techniques you can use. Some techniques are better than others for masking and masking what you want. Some techniques are quick and easy. Some are as precise as the best hair masker. Use the Checkmark Technique With Photoshop CC, go to File > New > Technique and then type mask in the manual text. Put the formula button and checkmark beside it to create your mask. If you are in Lightroom, right click on the text and then go to Edit > Distinctive Features > Font. Put your eyes closed and highlight to mask the text. Now let’s take a look at a successful masking technique using the checkmark technique. Use an Import Gimp Mask The good thing about this technique is that it is very simple. But there are a lot of things to learn before you can be successful. https://www.academia.edu/51788079/Getting_Hair_Ready_in_Photoshop https://www.slideserve.com/staciekjones/getting-hair-ready-in-photoshop
Why you need to mask your imageIf you're anything like us, you'll find yourself wanting to tweak a picture day in and day out. We do that, too. And in our fast-paced digital lives, things like editing, uploading, and uploading, editing, uploading, and uploading can leave us overwhelmed and frustrated. We're the type of people who have mastered the fine art of impulse purchases when we have an urge for something, but often lack the patience and the time to do the research for an item we want. That's why our new collection of DIY Video Production resources is perfect for you. We know that you'll get the most out of this collection if you have a few minutes to dedicate to editing, since most of the videos here require you to cut and paste the directions and patterns right from the site.Photo Retouching means the elimination of all the imperfections from a photo, which usually includes colour and tone correction, blemishes and under-eye circles removal, change of brightness, contrast and saturation.How to create a clipping mask1. Open Photoshop. 2. On the Photoshop Actions menu, click "Clip from Document". 3. Browse through your document, and click the image that you want to mask. 4. Right-click the image and select "Rectangular" from the drop-down menu. 5. Click "Yes, To Clip". 6. Click "OK" and save the file. Click to zoom Let's break down these steps further: Select the rectangular button (one of those little silver squares) that appears above the selection area, which is in the upper-right hand corner of the canvas. Clicking "Yes, To Clip" will allow you to clip your selected images from the document to the new one you're clipping. The rectangle button is in the upper right hand corner of the canvas. The purple button above the rectangular button controls the direction of the clipping.Masking for editing pictures1. First thing to do is to take a look at the picture you wish to mask. I usually place my mask on the photo and then use the mask to navigate through the photo to select the part of the photo I want to mask. 2. If you're looking for a specific color, or color shade, simply hover over the colors. Click the black object in the center of the white shape. You will see a drop down menu with suggestions. Click the "Invert" link, then click "Swap". If you're looking for a certain hue (like pink), click the "Invert" link, and then click "Swap". 3. Press "Next". You will see a list of masks that you can choose from. 4. Select the first mask that you see. 5. Click "Done". The mask will now replace the background, or another portion of the photo, so that the foreground can be fully seen. https://www.academia.edu/51462501/Tips_to_Mask_Your_Image_for_Privacy https://www.slideserve.com/staciekjones/10-tips-to-mask-your-image-for-privacy https://docdro.id/zbyBmit https://www.edocr.com/v/dglzg5wn/staciekjones/10-tips-to-mask-your-image-for-privacy https://visual.ly/community/Others/computers/10-tips-mask-your-image-privacy https://www.worldranklist.com/preview/pdf/388229/10-Tips-to-Mask-Your-Image-for-Privacy https://www.4shared.com/s/f6QW6MvyPea

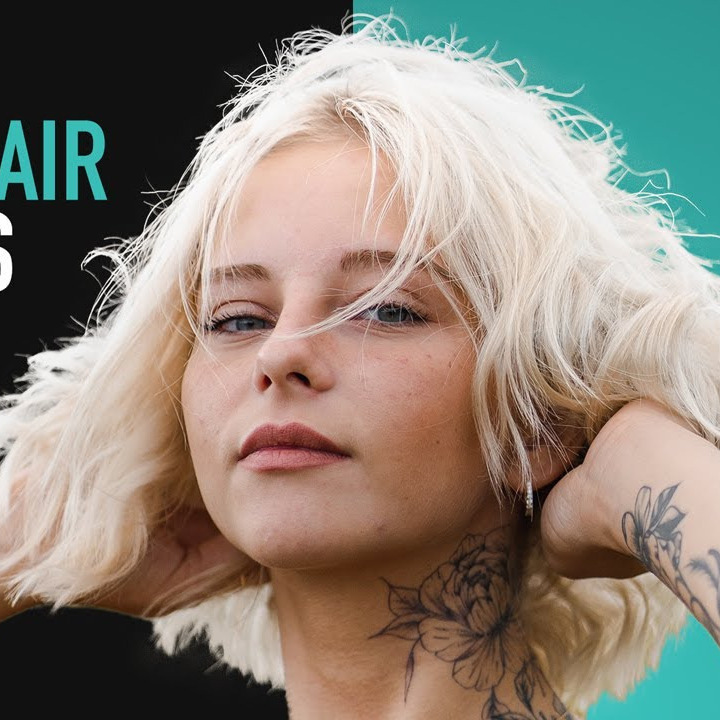
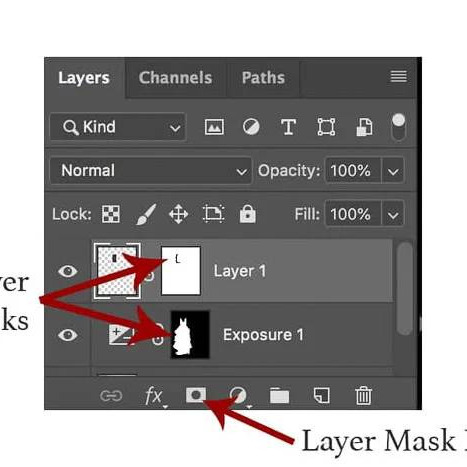

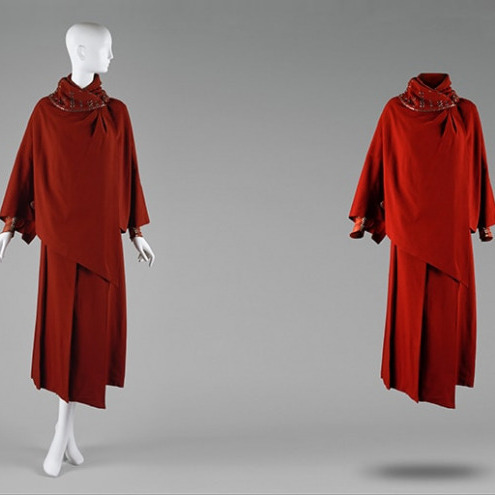

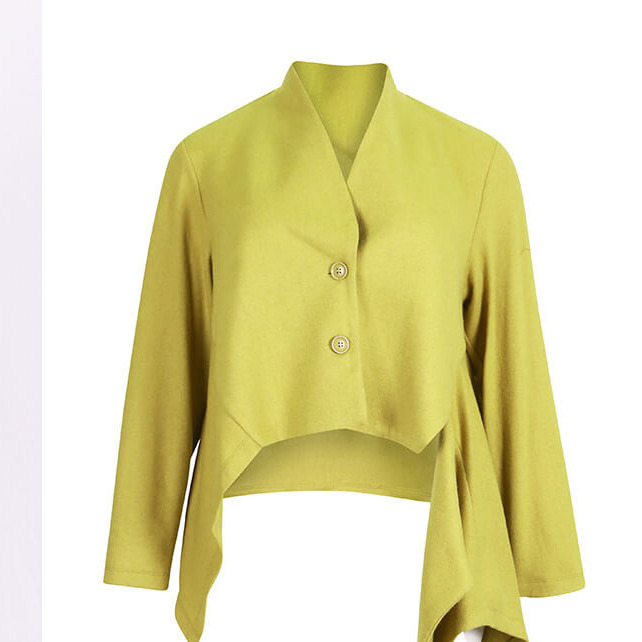

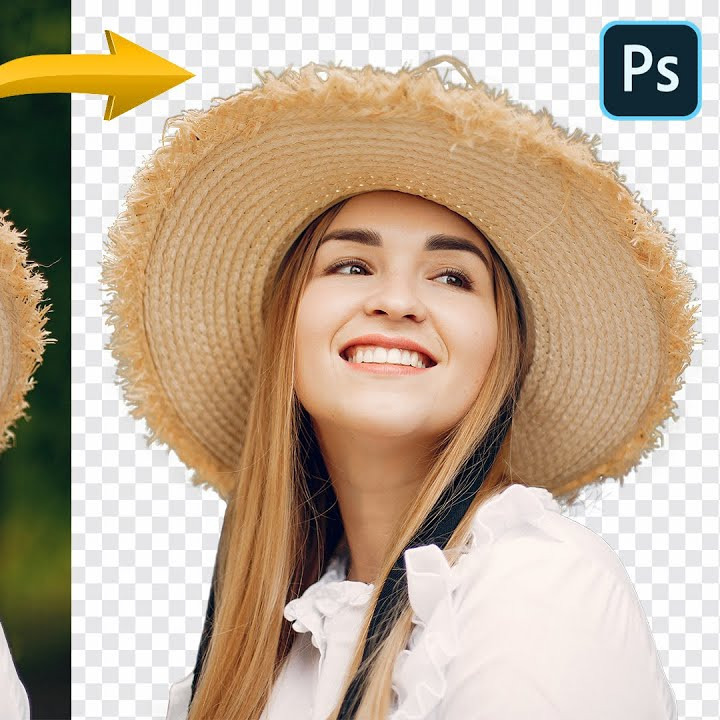
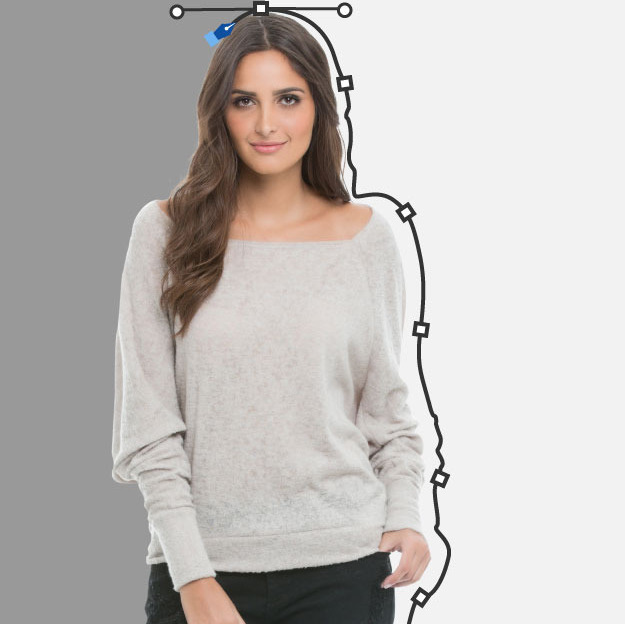

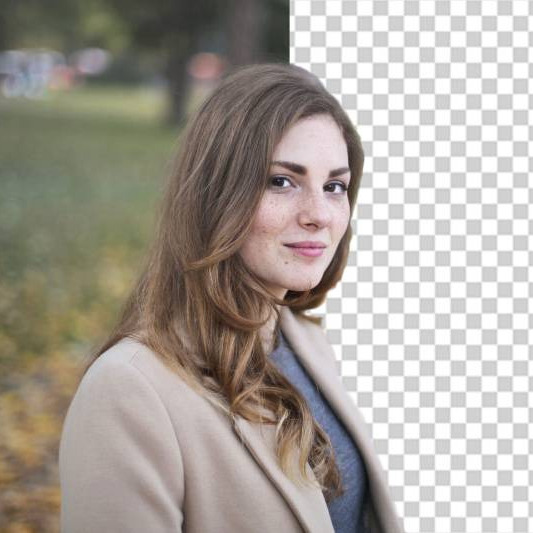

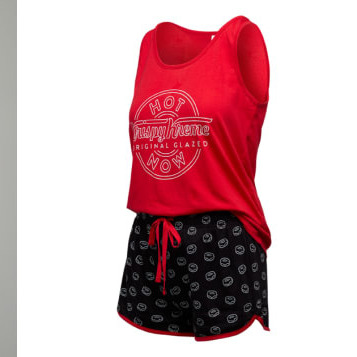


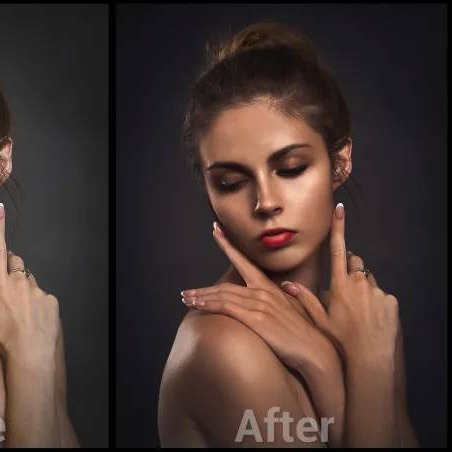
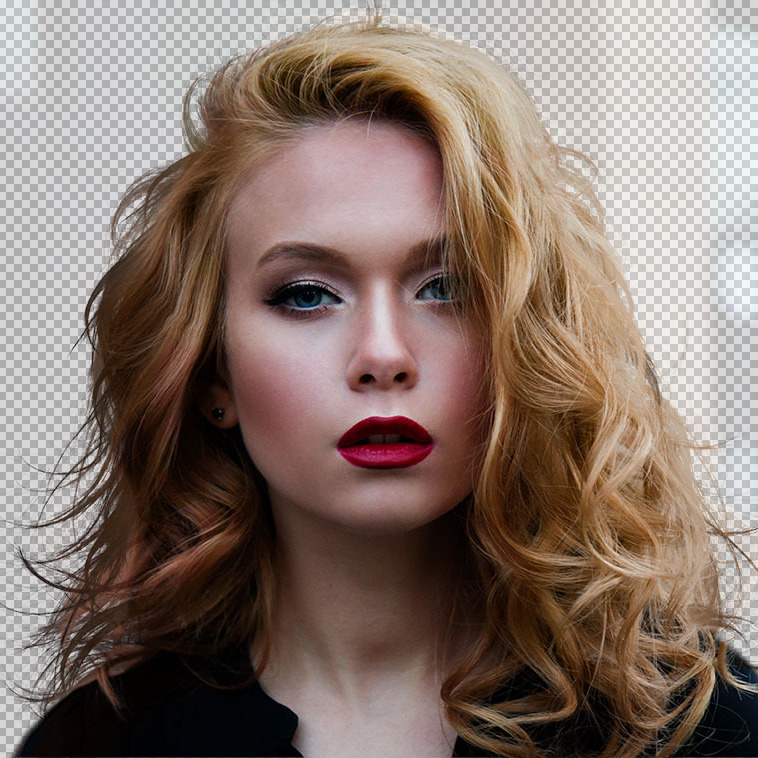


The photo that presents your business must be impeccable. It is always better to entrust the processing of such content to professionals, I found them here http://photo.services/