Create a Stunning Responsive Resume with HTML and CSS
Description
Project: Responsive Resume Website
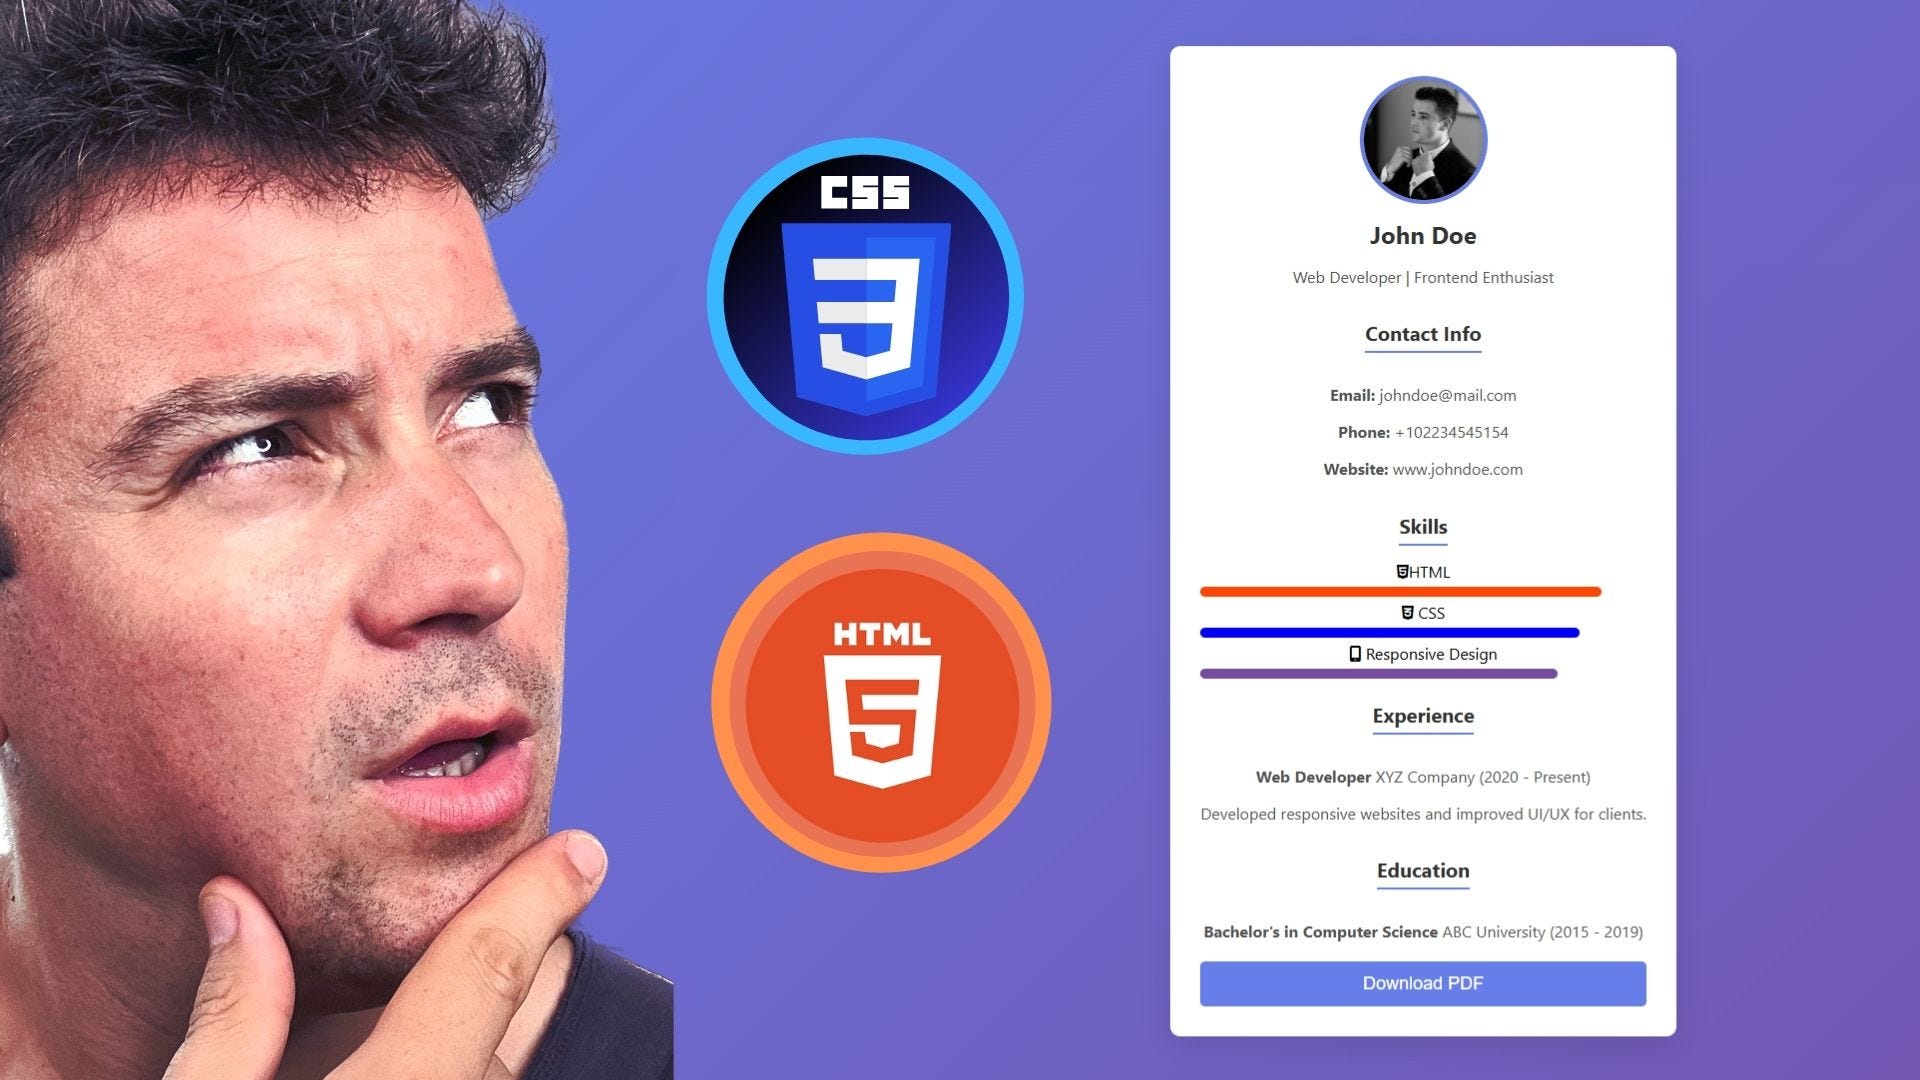
A single-page personal resume website showcasing:✅ Name, photo, and a short bio✅ Contact information✅ Skills section with progress bars (pure CSS)✅ Work experience & education in a neat layout✅ Downloadable PDF resume button✅ A responsive design that adapts to mobile & desktop
📌 Features Included:
✅ Fully responsive (mobile-friendly)✅ Sections: Profile, Skills, Experience, Education, Contact✅ Printable/downloadable as a PDF using CSS✅ No JavaScript required
Why This Is a Good Tutorial?
* Beginner-friendly: Covers structuring with HTML and styling with CSS.
* Real-world use case: Viewers can build their own resume website.
* Demonstrates responsive design: Teaches Flexbox/Grid for layout.
* No JavaScript required: All functionality is handled with HTML & CSS.
Introduction
In this tutorial, we will create a beautiful and responsive resume using HTML and CSS. This resume will include sections for contact information, skills, experience, and education. Additionally, we will add a button to download the resume as a PDF. Follow this step-by-step guide to enhance your web development skills and create a professional resume.
Step 1: Setup Your Project
* Create a new folder for your project.
* This folder will contain all the files related to your resume project.
* Inside the folder, create two files: index.html and style.css.
* index.html will contain the HTML structure of your resume.
* style.css will contain the CSS styles to make your resume look great.
Step 2: HTML Structure
Open index.html and add the following basic HTML structure:
My Resume
John Doe
Web Developer | Frontend Enthusiast
Contact Info
Email: johndoe@example.com
Phone: +123 456 7890
Website: www.johndoe.com
Skills
HTML
CSS
Responsive Design
Experience
Web Developer - XYZ Company (2020 - Present)
Developed responsive websites and improved UI/UX for clients.
Education
Bachelor's in Computer Science - ABC University (2015
- 2019)
<button>Download PDF</button>
Explanation:
* DOCTYPE and HTML structure: This sets up the basic HTML document structure.
* Meta tags: These tags ensure proper character encoding and responsive behavior.
* Title: Sets the title of the document.
* Stylesheets: Links to external CSS files for fonts and icons.
* Body: Contains the main content of the resume, divided into sections like header, contact info, skills, experience, and education.
Step 3: Styling with CSS
Open style.css and add the following CSS code to style your resume:
/* General setup */
body {
font-family: "Poppins", sans-serif;
background: linear-gradient(135deg, #667eea, #764ba2);
display: flex;
justify-content: center;
align-items: center;
height: 100vh;
margin: 0;
padding: 20px;
}
/* Resume Section */
.resume {
background: white;
padding: 30px;
max-width: 600px;
box-shadow: 0 10px 30px rgba(0, 0, 0, 0.1);
border-radius: 10px;
text-align: center;
}
header img {
width: 120px;
border-radius: 50%;
border: 4px solid #667eea;
}
h1 {
margin: 10px 0 5px;
font-size: 24px;
color: #333;
}
/* Contact Section */
h2 {
border-bottom: 2px solid #667eea;
display: inline-block;
padding-bottom: 5px;
margin-bottom: 15px;
font-size: 20px;
color: #333;
}
p {
color: #555;
}
/* Skills Section */
.skills .bar {
height: 10px;
background: #e0e0e0;
margin: 5px 0;
border-radius: 5px;
overflow: hidden;
}
.bar div {
height: 100%;
transition: width 0.5s ease-in-out;
}
.html {
width: 90%;
background: #ff5733;
}
.css {
width: 85%;
background: #33a1ff;
}
.responsive {
width: 80%;
background: #33ff57;
}
button {
display: block;
width: 100%;
padding: 12px;
background: #667eea;
color: white;
border: none;
border-radius: 5px;
cursor: pointer;
font-size: 16px;
margin-top: 20px;
transition: 0.3s;
}
button:hover {
background: #5563c1;
}
/* Print layout */
@media print {
button {
display: none;
}
body {
background: white;
}
.resume {
box-shadow: none;
}
}
Explanation:
* General setup: Sets up the font, background, and layout for the body.
* Resume section: Styles the main resume container with padding, shadow, and border radius.
* Header: Styles the profile image and main heading.
* Contact section: Styles the contact information.
* Skills section: Styles the skill bars with different colors and widths.
* Button: Styles the download button with hover effects.
* Print layout: Hides the button and removes background and shadow for printing.
Conclusion
By following these steps, you have created a stunning and responsive resume using HTML and CSS. You can further customize the styles and content to match your personal preferences. This project not only helps you create a professional resume but also enhances your web development skills. Happy coding!
Get full access to Norbert’s Web Dev School at norbertbmwebdev.substack.com/subscribe

